Hi Luvs! If you are anything like me, you started off in photography taking photos of your family, food, landscapes, etc. You began learning more, posting your photos on social media and slowly growing your following. This is nothing more than a fun hobby, you say. I will never make a dime, you say…Then one day- a stranger contacts you and asks you to take photos of their family/wedding/baby. You PANIC. You turn down a paid opportunity because “What if they hate the photos? What if I suck?”
What.IF. What.IF. What.IF. And you know what? You should be worried because taking photos of a bridge is not the same as taking photos of a 2 year old toddler. The Bridge doesn’t care if it looks fat or ugly. You can’t hurt or upset The Bridge. But people? Yes. How you capture them and THEIR opinion of the photos matter WAY more than your own. You should care because they are spending their hard earned money and precious time on you. And in this blog, I will share with you the very valuable lessons I have learned to ensure that you not only meet, but EXCEED their expectations.
BASIC GEAR
- DSLR/Mirrorless Camera
- Prime Lens with wide aperture – 35mm F/1.8 (anything with an aperture wider than F/2.8
- Off Camera Flash – My Affordable One: Link HERE
- 5 in 1 Lighting Reflector and Diffuser: Link HERE
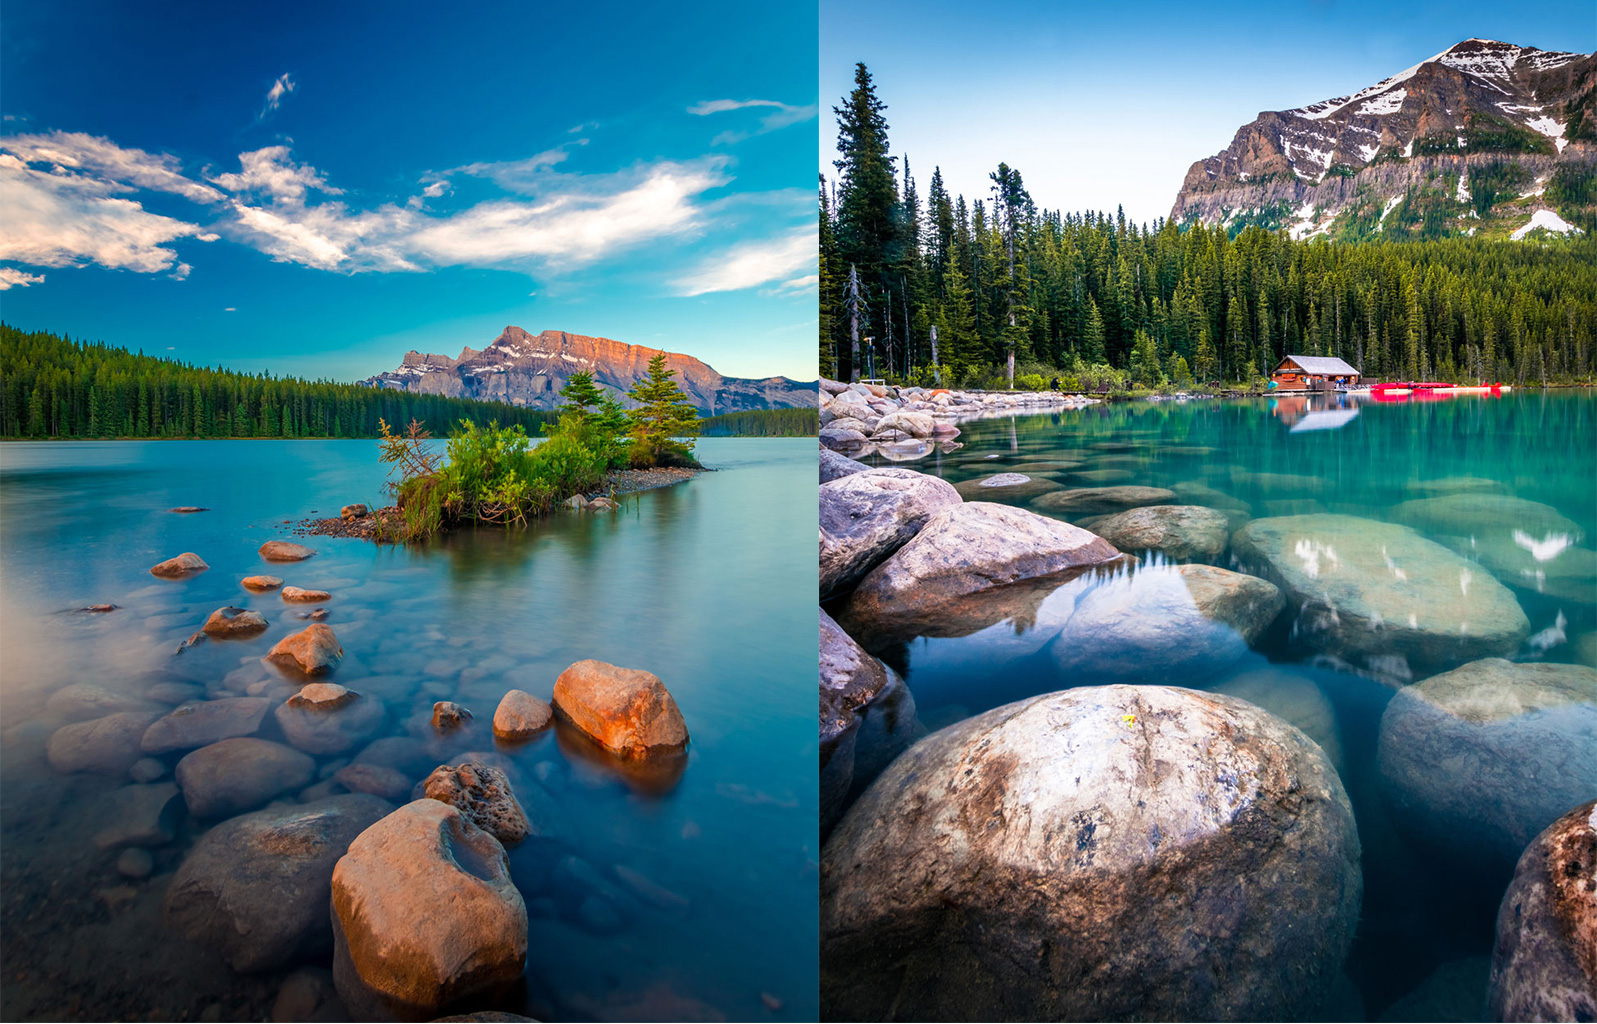
1) SCOUT YOUR LOCATION
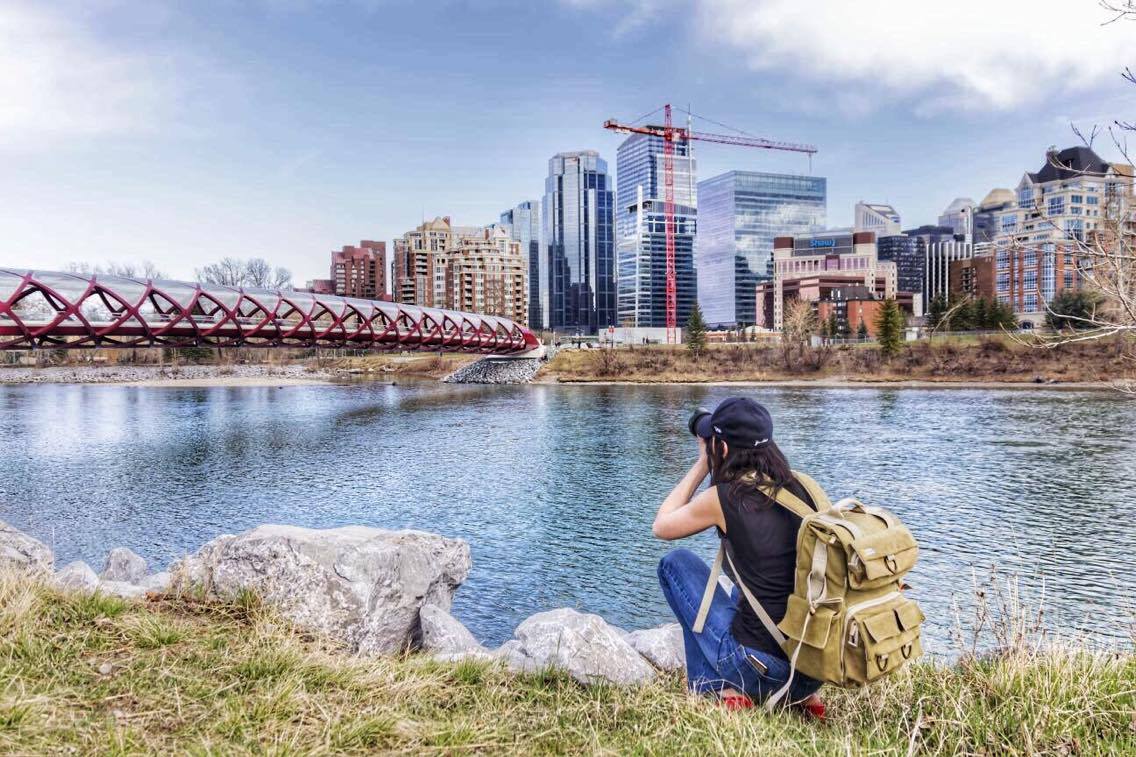
I am not the biggest fan of studio photography. I prefer shooting on location in places that reflect your client’s personality. If it is a young urban professional, go to the city and use it as a backdrop. If it is a family, go to a park and let the children play and capture those candids.
However, shooting outdoors does not come without challenges. Which is why you need to visit your location first. Preferably, visit the location days before at the same time you have booked your session so you can see how the sun will light the area, how busy the area will be, what different elements you can work with to add variety to your photos (bridges, lakes, trees). If you don’t do your homework, you could show up and have tons of people in your photos, the area could be dirty, boring, too bright, too dark. Then you are in real big CACA. I have a list of places I offer portrait shoots that I know like the back of my hand. If it is a wedding, request to visit the place before hand to be prepared.
2) RESEARCH POSING IDEAS
When you are on location with your clients- lets say a couple wanting romantic engagement photos- it is not intuitive for them to just begin kissing and holding in front of a total and complete stranger. As someone who has been photographed, all I know to do is put a hand on my hip and smile. That is the M.O. of 99% of the folks you will get unless you are shooting a professional model who can strike 20 poses in 20 seconds.
Most people feel awkward and they expect YOU the photographer to tell them exactly what to do. They rely on you to be the photographer/creative director/story teller. When I get a request- I ask all the info: How many people? For what purpose? And I immediately go on Pinterest/Stock Images/Instagram and start saving a wide variety of poses and ideas on to my phone. I come up with at least 15-20 ideas and I show up to my shoot with them on hand. Many of the photos are impromptu as ideas begin to arise the more comfortable you get but you at least have a plan that will kickstart the session. DON’T just show up and hope for the best. Fail to prepare, prepare to Fail.
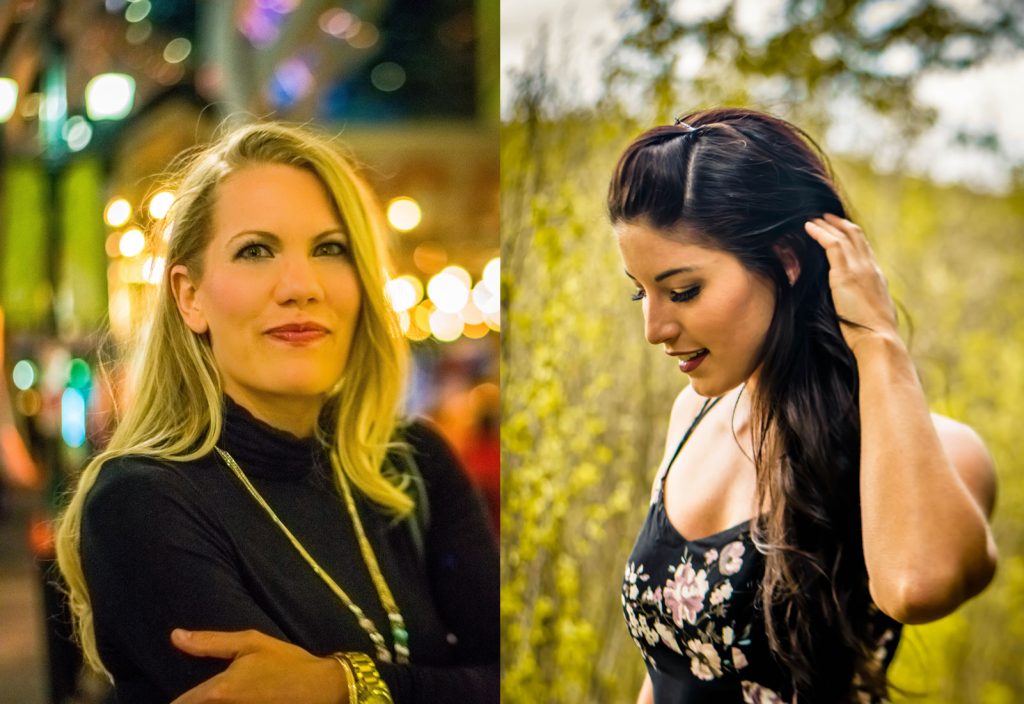
3) CREATE CREAMY (BLURRY) BACKGROUNDS
I love the word creamy, and I love a creamy Bokeh (fancy Japanese word for blurry background). When I took my very first photography course all I wanted to do was learn how people got that blurry background. In portrait photography, it can really make your subjects stand out even more. To get that beautiful effect, you have to follow these 3 Simple Steps:
- Set a wide aperture– the widest F stop your lens can go (2.2/1.8/1.4). If your aperture is at F/5 and above- it will be very hard to achieve that beautiful bokeh. At F/9, you can forget it.
- Make Sure Your Background is Distant: You won’t get a bokeh if the background is directly behind your subject, no matter how wide your aperture is. The more distance between your subject and background, the blurrier the bokeh will be.
- Be Close or Zoom In On Your Subject: Make sure that you are close to your subject or if you can’t be (lets say you are shooting a wedding), zoom in and focus on your subject. Failure to do so will result in your camera not knowing how far your subject is from the background or what your subject is, therefore- not making it blurry.
All 3 conditions need to be met to get that desired effect in portraits. If you are not doing all 3, it is not going to work.
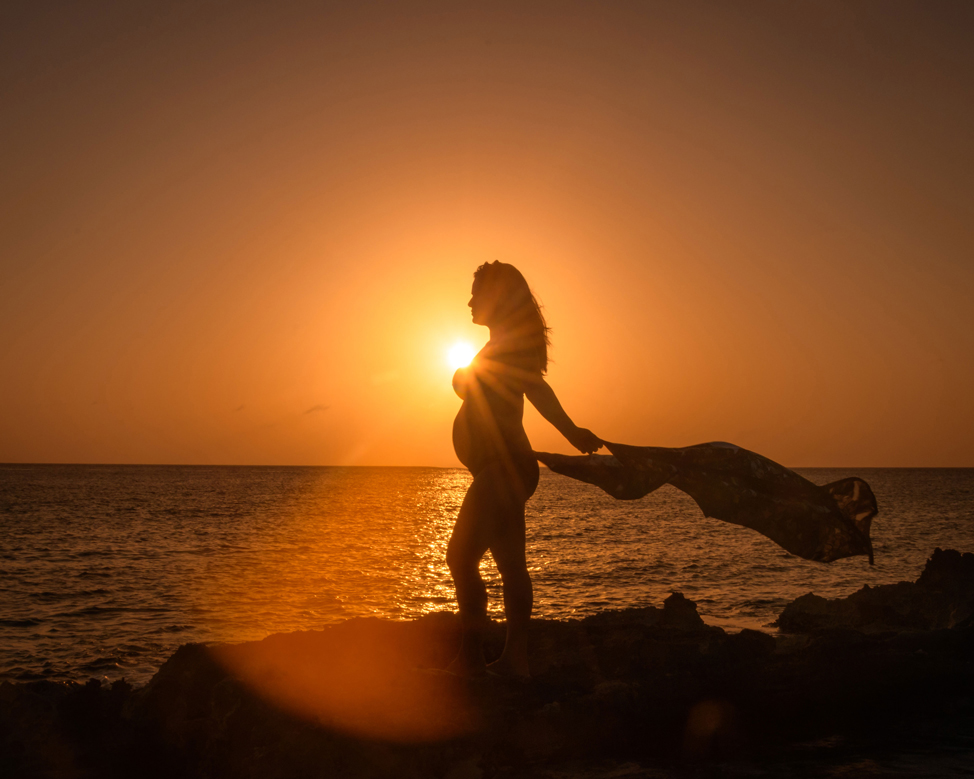
4) DEAL WITH THE SUN
The best times and conditions to shoot in are sunset or overcast. Why? Because the light is soft and diffused. You don’t have to deal with harsh shadows or squinty eyes. I always try to book my session at sunset or if it is short notice, on an overcast day. However, sometimes that is not an option. Your client can only meet you at 2pm right in the middle of the day. This is when knowing your location is important because you can see where you can find the nicely shaded areas.
Here is how the sun affects your photos:
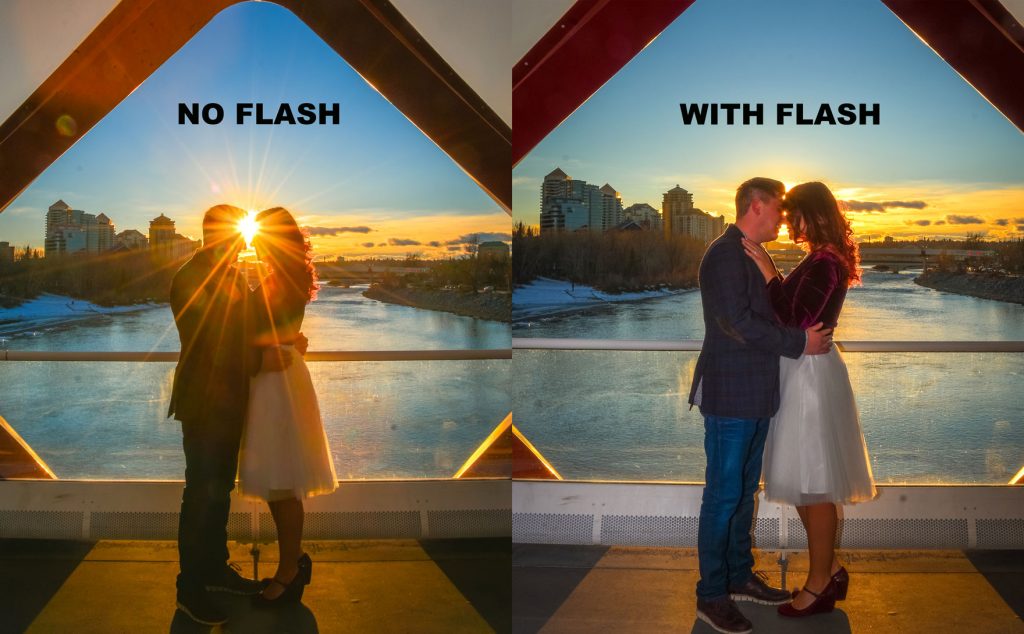
- If the sun is directly behind your subject, it will create a dark silhouette.
- If the sun is lighting one side of your subject- you’ll have your subject half overexposed/half in shadows.
- If the sun is directly above- crazy shadows under their noses, necks, eyes.
- If the sun is directly in front- Good Luck trying to get them to smile and look natural while their retinas are burning.
If you can’t find a nice spot that offers shade, here is where your gear will come to the rescue:
A) Use your Off Camera Flash (OFC) as fill light- With OFC you can control the strength and direction of the flash allowing you to completely eliminate any strong shadows by creating your own light source. If the sun is directly behind them, it will eliminate silhouettes.
B) If you have a friend or assistant, use your 5 in 1 Reflector and Diffuser. Have them hold the diffuser or reflector to control or direct the light on your subject as you take the photos.
5) INDOOR PHOTOGRAPHY
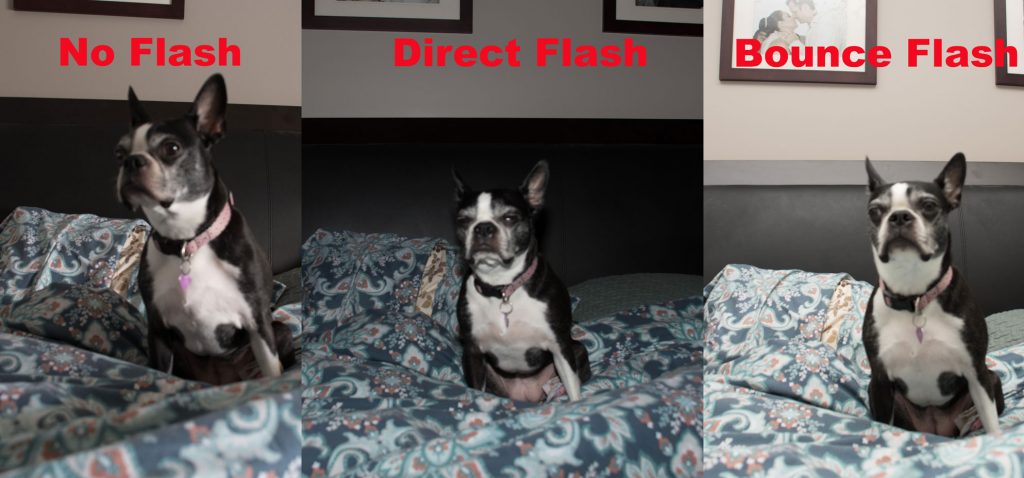
Unless the space has large windows that bring in plenty of natural light- BRING YOUR OFC. Let me repeat- BRING YOUR OFC. Do not rely on poor, fluorescent light bulb lighting, and do not rely on just placing your subject beside the one window in the room for a well lit photo. You will have to crank up your ISO, and nobody wants a grainy photo. You will also be limited to the light you are given. By using OFC indoors, you can point it to the ceiling and bounce it from the roof to create a brighter, well diffused photo. I do not shoot the flash directly at the subject. I always look for ceiling or wall (in white or neutral colour) to bounce off to diffuse the light and create a natural ambience. Shooting flash head on will overly expose your subject and darken anything behind them. Bounce, bounce, bounce. Also, make sure you are not bouncing of a dark wall because it will absorb the light, or a red/green or bold colour because the light being bounced will have that hue.
FINAL TIPS
- Be Professional but Be FRIENDLY. Having a stranger photograph your family is intimidating and nerve wracking. It is your job to put them at ease. Smile, share funny stories, ask them questions about themselves as you are doing the shoot. Don’t treat this like just another job that you are getting paid for. Provide positive feedback and reassurance that they are doing great and looking good. It will get them smiling naturally, having fun and genuinely being themselves. You want to capture their essence. You don’t want stuffy, posed, tense photos.
- Suggest Coordinating Outfits: Especially for family photos- they don’t all have to be wearing the exact same outfit as that is impossible to find and can be expensive, but have a common colour. Have them all wear something yellow or red or plaid. Visually it creates a sense of unity in the photos.
- Be Ready for The Unexpected: Most of the times, the best photos are taken when they are not posing. When the child is being playing by the water, when hubby says something funny that makes her laugh. Those are the most genuine moments and your finger needs to be on the trigger and ready to capture.

Learning to shoot portraits is exactly like learning anything new. You have to say YES to those opportunities as it is the only way to get better. In the meantime, practice with your own family and friends. Build your confidence and style. Like everything else in life- practice makes perfect. Even Annie Leibovits who is an acclaimed celebrity photographer had to to start from scratch and learn her craft.
These tips will give you a head start on to the next challenge that you will conquer if you grow a pair of cojones and start believing in yourself.
Happy Shooting,
Robin